Saturday, 4 October 2014

Loading fleece on the frame

fleece loaded on the NEQ2 quilting frame


When I use fleece instead of backing and wadding I only need to load 2 layers on the frame. 

This tutorial shows how to load a quilting frame with just 2 layers; the quilt top and the fleece backing that also serves as the wadding or batting. 

Because fleece acts as wadding AND backing, it's a real money-saver!

New English Quilter ratchets
 Look at the ratchet ends of the NEQ fabric poles.
They're labelled 1, 2 and 3.


Here they are in the frame; 
number 1 is closest to you as you stand by the sewing machine
 number 2 is in the middle and number 3 is farthest away.

notice the ratchets are on the right hand side of the fabric poles
 You are going to begin with fabric pole number 3, the pole farthest away from you.

Add caption
Take the 3rd fabric pole out of the end pieces and bring it to the front of the frame. This is to make it easier on your back, so you are not bending over the frame to do the pinning. Be sure to keep the ratchet end on your right hand side. On this third fabric pole notice that the leader fabric is coming over the top of the pole.


Fold your fleece in half to find the centre and match the centre of the fleece to the centre line marked on your leader fabric.


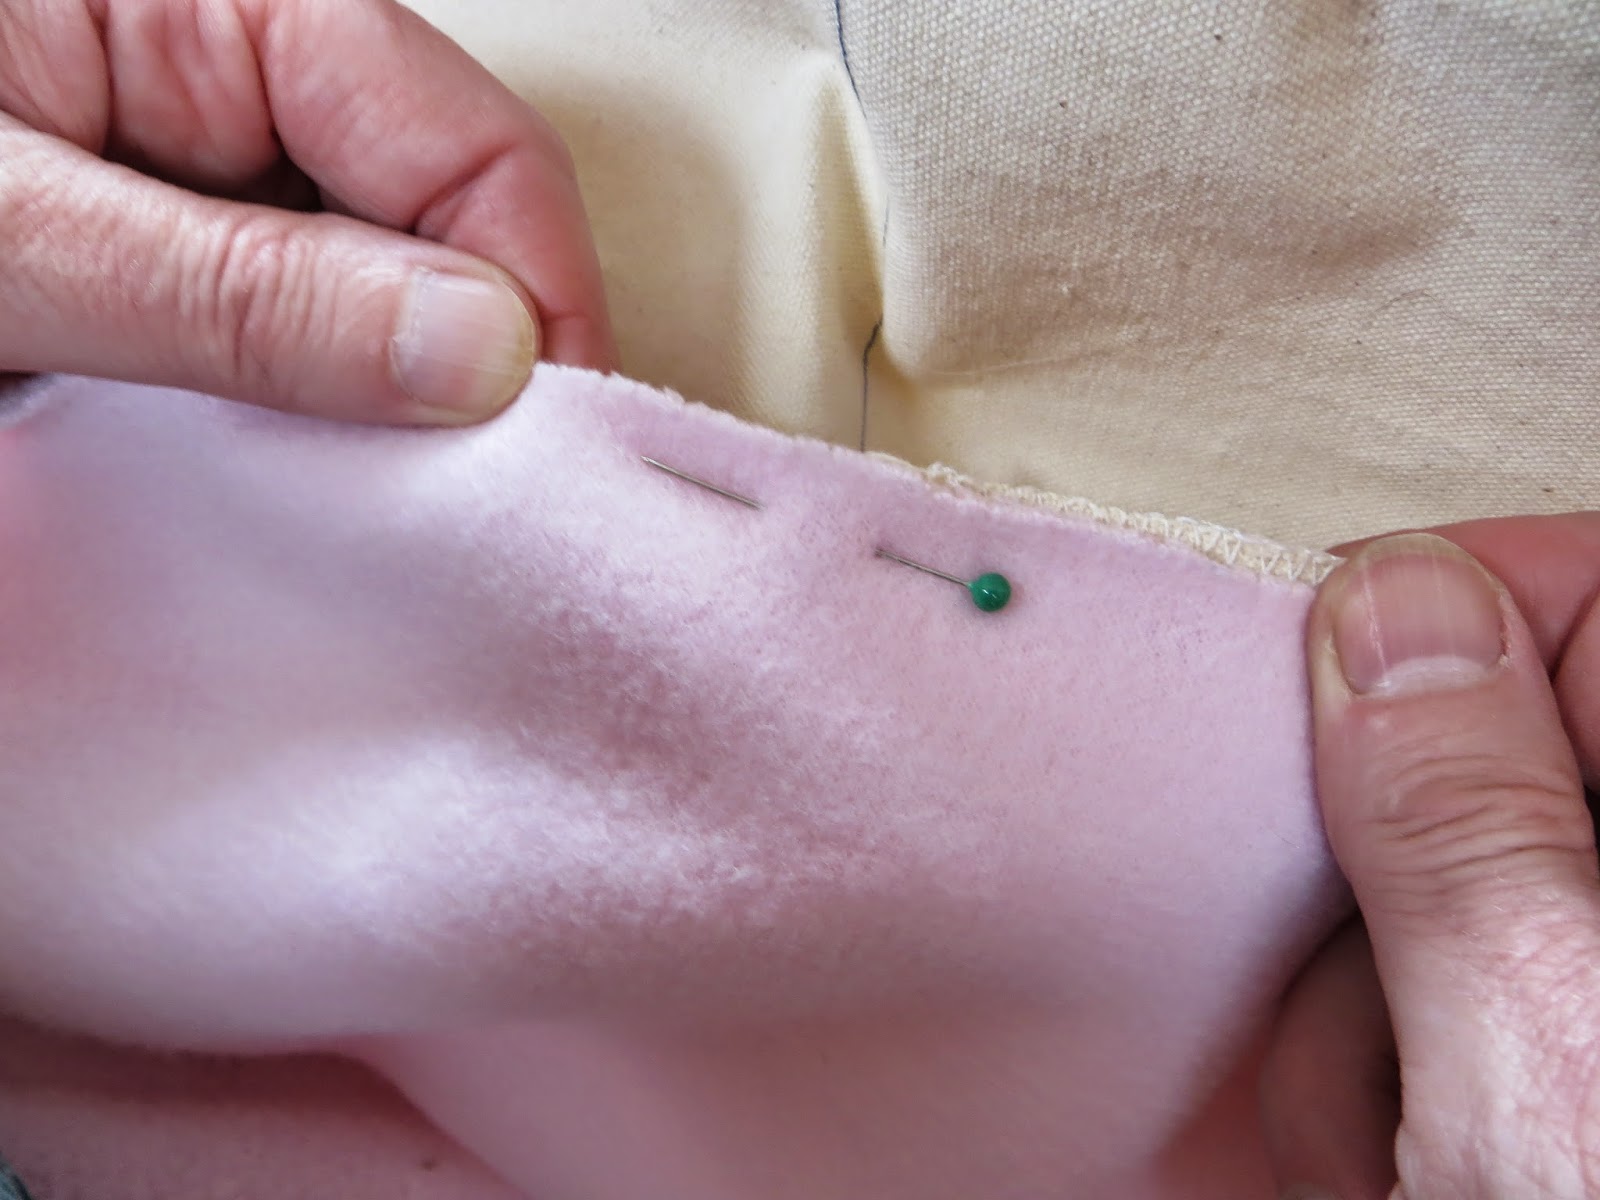
Butt the two ends together, with the right side (good side) of the fleece facing down, 

keep the good side of the fleece facing down
pin from the centre outwards, 


Notice that you are pinning to the back side of the leader fabric. This will keep you from stitching the fleece to the leader fabric by mistake later on when you are quilting.


Carry on pinning all the way to each end of the leader fabric. 


When you get to the end use two pins or a saftey pin.


 Most of the tension will fall on this last pin. Doubling up or using a safety pin will keep the final pin from bending under the pressure.


Now roll your fleece onto the fabric pole smoothing it out as you go,


and drop it back into position on the frame. That's the third fabric pole all loaded.


It should look like this. Good. Now on to the second fabric pole.


You are going to treat the 2nd fabric pole 
exactly the same way as you did the third:
  • take the 2nd fabric pole off the frame 
  • and bring it to the front of the table so you don't have to lean 
  • Fold your top to find the centre. 
  • Pin the centre of the top to the centre of the leader, 
  • butting the two ends together so the back of the quilt top is smack against the back of the leader.  


Pin all the way from the centre to both ends. Finish with 2 pins or a safety pin. Roll the fabric onto the poll, smoothing out as you go along and drop the number 2 fabric pole back in the middle slots on the frame.


Now you are going to go back to the fleece on the third fabric pole. 
Disengage the ratchet so you can pull the fleece forward, 
Fold the fleece in half to find the centre 
and pin the centre of the fleece
to the centre line on the leader fabric on the first fabric pole.


This time you are pinning to the TOP of the leader. Use the line of stitching sewn on the leader fabric to help you align your fleece nice and straight. Take care not to stretch the fleece. Pin from the centre outwards to each end and finish with two pins or a safety pin.


Now re-engage the ratchet tension and tighten the fleece between the 1st and 3rd fabric pole. This makes a sort of table. Finally you will pull the quilt top fabric from the 2nd fabric pole forward and pin it about a centimetre higher than the line of pinning on the fleece. Smooth it out as you go.


If you like you can slip an IKEA ironing board on the table under the loaded quilt sandwich and give it one last iron. Now you're all loaded and ready to start your quilting!


Follow this link for directions on loading 3 layers; of top, wadding and backing fabric. If you have any questions this earlier post may help.

Thursday, 2 October 2014

Piecing Fleece

piecing fleece using the zig zag stitch on my JUKI Exceed 600

I'm going to do a few posts on fleece. I sometimes use fleece as an alternative to backing and wadding.

Fleece can do the job of both backing and wadding at the same time for a fraction of the cost.

Fleece is easy and fun to machine quilt and gives a soft and cuddly finish. What's not to like?

One of the great features of fleece is that fleece doesn't fray!

Which makes it great for all sorts of craftsy projects including quilting.


Here I'm piecing fleece by butting the two edges together and using a zig-zag stitch to join them.


 I do this to avoid the extra bulk that a regular straight stitch seam would make.

Here I've pieced together some scraps of fleece to make a bigger backing. 

I used a grey thread because it was in the machine from when I was piecing the top. If I had changed the thread to match the fleece colour, you would not notice it at all.


Grey OMNI thread is ideal for piecing
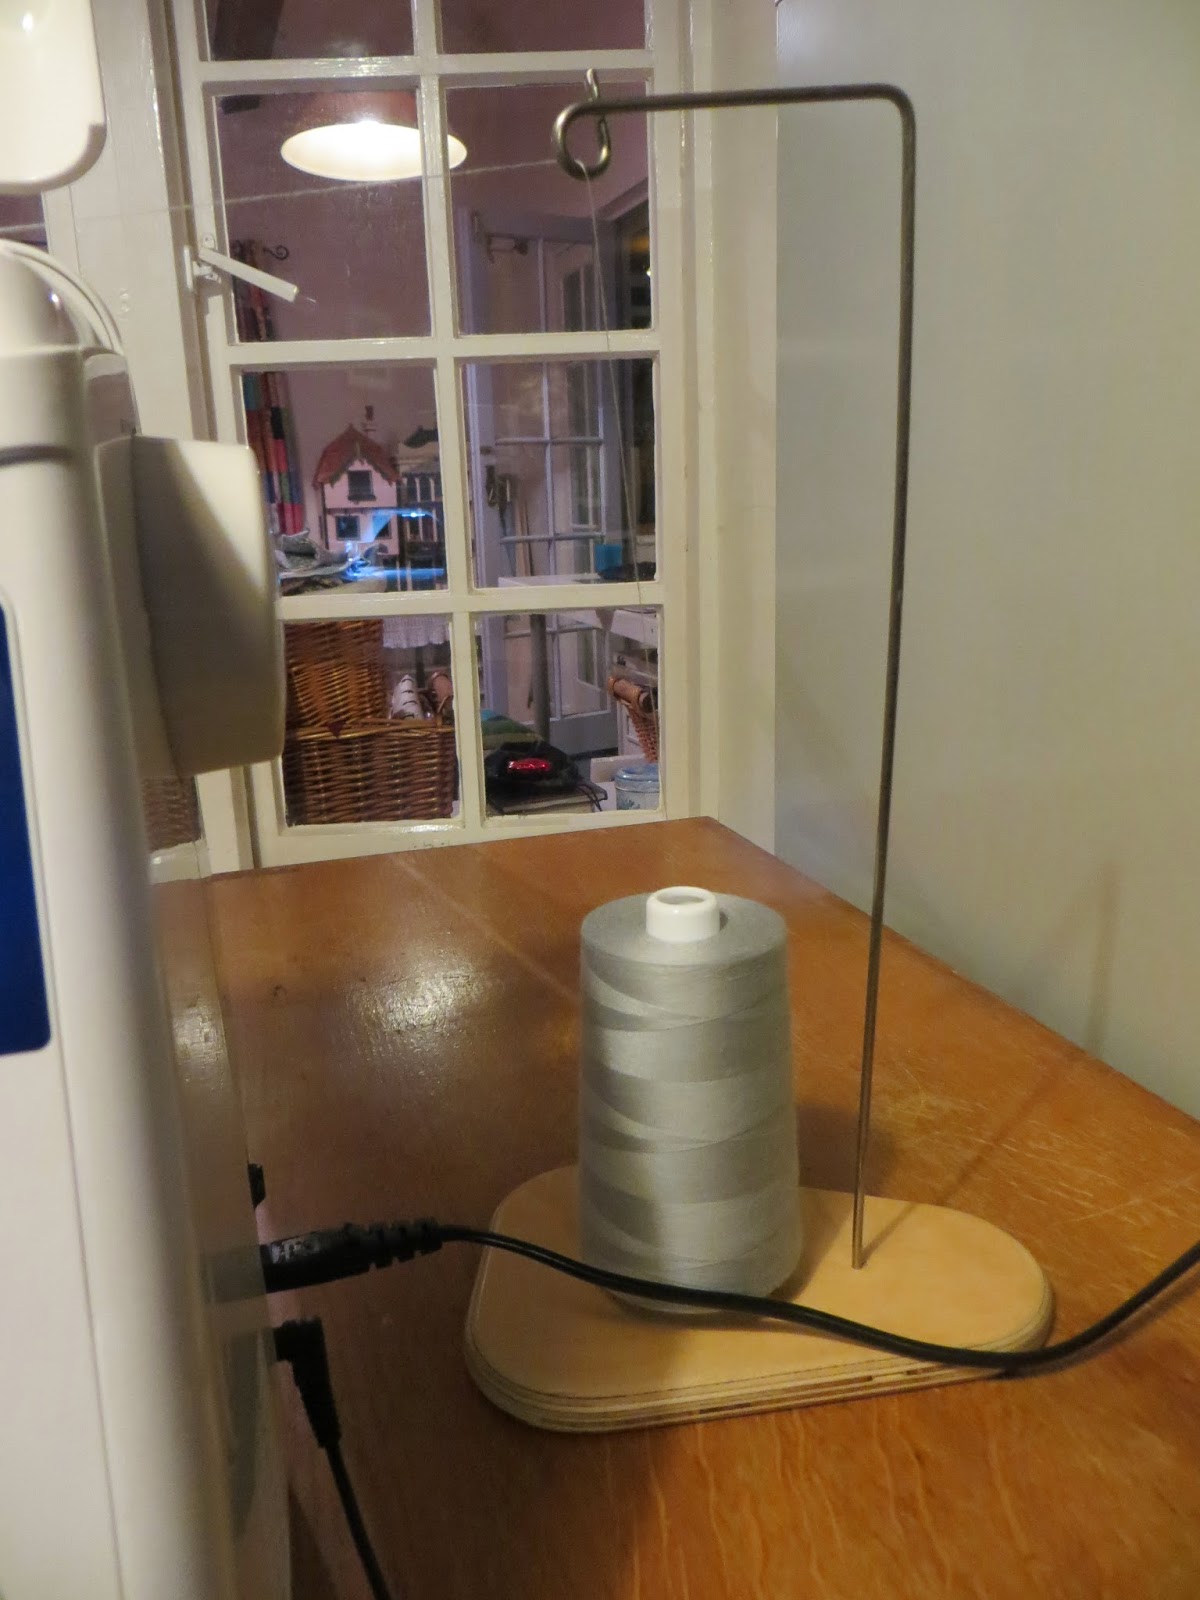
My JUKI HZL 600 sewing machine does not have an extendible thread guide for these larger, more economical cross-wound cones. This thread stand lets me take advantage of the large cones. I put the thread on the stand and run it through the wire loop at the top, then I go ahead and thread my sewing machine as normal.

zig zag stitch for piecing fleece JUKI HZL Exceed 600
I used this pale pink fleece as the backing and wadding for Rosie's university quilt. Notice how nicely the quilting pattern shows up on the fleece backing.

(look at the roll under the arm of the sewing machine) Now that it's getting colder, it makes me happy to think of Rosie all nice and warm, snuggling under her fleecy quilt.

Fabric Online is a great UK source for fleece.

Rosie's university quilt on the 8 foot New English Quilter2 frame

Tuesday, 23 September 2014

We do Birthdays!


OMNI thread cones all wrapped up
Superior Threads make great Birthday presents. 


And if you like, we'll wrap them 
up pretty for you so they're all ready to give to your quilt loving
friends and family. 

 This customer wanted OMNI cones for his mum. 

OMNI cones hold 6,000yds of thread for £11.99

That's lots of happy quilting! 


Superior Threads 
come in many ranges, 
in all sorts of luscious fibres, 
all designed with the machine quilter in mind. 

If you'd like us to wrap them for you, send us an email. 

Superior Threads ~ a present that keeps on giving!

P.S. we do Christmas too!

Monday, 15 September 2014

How to assemble the frame


Here's a little video clip that shows just how easy it is to set up our New English Quilter frames. I'm posting it especially for you gals who are having your frames delivered in the next couple of weeks. It really is this easy! You'll have it out of the box and ready to go in less than 5 minutes. If you have any questions just give me a ring. 01526 378057

Wednesday, 10 September 2014

September Superior Threads


I'm putting the September Superior Threads order through today. With autumn on the way and the kids back in school and off to University, I'm keen to get quilting again. Superior Threads has many ranges designed especially for machine quilting. You can browse through our website or ring Martha for suggestions. Today I'm going to chat about FANTASTICO one of my favourite threads.

There are new variegated colour combinations in the Fantastico range. Use the American site as a shop window and email me your orders. 

Fantastico is my new favourite thread. It's a break-through thread that doesn't break! Fantastico has tensile strength which means that it has a bit of give in it. You can read more about it on the Stateside site. Fantastico is designed to cope with the high speed sewing of industrial and long arm machines.  I love how it runs through my JUKI TL98P at 1500 stitches per minute. It works great on the higher speed long arms like the Avante (1800 spm) and the new JUKI long arm (2200 spm). It's a gorgeous light reflecting thread. I'm very excited about all the new variegated colour combinations. And it's great value for money at £12.95 for a 2,000 yd cross-wound cone.

Fantastico. Strong. Beautiful and Affordable. 

Tuesday, 9 September 2014

Edinburgh Road Trip


Our daughter Rosie 
is off to Edinburgh University 
to study architecture. 

Emily and I drove Rosie up last weekend to get her settled in her accommodation for the start of Freshers Week.

September sunset at Edinburgh

The light turned all the grey to gold
a lone piper
Rosie and Emily
guilded by the setting sun
Rosie's accommodation
moving in the room
even the curtains match the quilt
 "Parting is such sweet sorrow" We're really going to miss Rosie! I'm glad that Emily was there to cheer me up on the way home.  Edinburgh is such a beautiful city! I'm sure that Rosie will love being there. And the quilt looks just great in her room! On those cold Scottish nights, she'll be able to snuggle in a bit of comfort from home.

Monday, 8 September 2014

Rosie's Uni Quilt

Rosie is off to the University of Edinburgh to study architecture. So of course she needed a quilt. We decided on a limited palette of pinks and reds with ivory, black and grey and used themed fabrics that had memories of home and recent travels; cats, pianos, Eiffel towers and roses, of course.

some of Rosie's favourite things
Sinking the squares into a grey background made the pink seem all grown up and just perfect for a Uni quilt.

adding the final borders with my JUKI HZL Exceed 600

piecing with a silver OMNI on top
joining the fleece backing with a zig-zag stitch

Auditioning the quilting thread

We chose the steel grey So Fine in the end. Rosie wanted a thread that would disappear into the borders. The #408 Silver So Fine has a subtle matt finish and worked perfectly. It went through the whole quilt without any trouble. We used Bottom Line pre-wounds in the bobbin in an ivory colour that would disappear into the fleece backing.

we used Emily's swirly feather pattern
The So Fine thread ended up creating great texture without drawing too much attention to itself which fit in well with the fresh modern feel of the quilt.

Rosie's quilt loaded on the 8 foot New English Quilter frame & JUKI TL98P

Since we only started the quilt the week before Rosie had to go, we needed to keep the piecing simple. We were inspired by this quilt made by Kelly Finster for her friend Laura. Rosie had a look through my pinterest boards and chose this quilt. Kelly and Laura became friends at the start of University. So it seemed a very fitting choice!

Kelley Finster's quilt for her Uni friend Laura
Rosie's quilt was a 6 day wonder! I finished the piecing on Wednesday and loaded it on the 8 foot New English Quilter frame, Emily and I completed the quilting on Thursday evening and I stitched the binding Friday, just in time for our trip up to Edinburgh on Saturday. It's wonderful how the right kind of tools enable us to complete a quilt beautifully and quickly.

I love how the thread played out
Rosie chose a stripy fabric for the binding