Showing posts with label JUKI TL98-P. Show all posts

Sunday, 30 December 2012

White Christmas


8 foot NEQ2 on the 8 foot table
I decided to call Kate's quilt White Christmas.        Here in England our weather is mainly wet so if we wanted a white Christmas we needed to make it ourselves. I loaded the quilt sandwich on the 8 foot New English Quilter 2 frame. You can see the 6 foot Table painted with Blackboard paint and the two foot extension in the regular pale-wood-finish. The extension transforms the 6 foot table to an 8 foot to accommodate the 8 foot NEQ2 frame.This is just the right size for a double bed quilt.

marking the scalloped border
I wanted a scalloped border to give some definition to the top. But I decided to do the marking once the quilt was already loaded on the frame as the frame holds the fabric straight and steady creating a perfect writing surface. I used a ceramic mug lid for a template as it was the perfect size. You can just see the bit of tape I put across to mark the middle. This helped me to align it correctly along the end lines marked on the top of the quilt. I used the wash-away-blue-marker to trace around the template. These became guidelines that were echoed and scalloped to form the border.

machine quilting detail showing the echoed scalloped border
The line design in the middle of the quilt is my take on a pattern that Emily designed with Trudi after a retreat last year. It's fun to see how patterns change when different people quilt them. This design uses a central swirl with a quill and feather shape that is scalloped. It's a wonderful overall pattern because each shape dovetails so easily into the next. We'll be featuring this pattern in our January Retreat coming up soon.

Emily's line design for the central panel scalloping was added to the stitching
central panel quilting detail
My thread choice was the NEW Magnifico from Superior Threads, a creamy white called Elegante #2169 

the NEW Magnifico from Superior Threads #2169 Elegante

Magnifico is a beautiful light reflecting tri-lobal polyester with unusual fibre strength which makes it perfect for long arm machine quilting. It's available in 300 colours so it was easy to find a match to the Oakshot fabric I'd chosen for the top. This good match enabled me to create a subtle texture which was the kind of look that Kate wanted in her quilt. We used Bottom Line pre-wounds in Ivory for the bobbins. I hate winding bobbins so I love using the pre-wounds from Superior. With all the shades of white in this project the quilting was lovely!

Juki TL98P on the 8 foot NEQ2 frame with Magnifico from Superior Threads
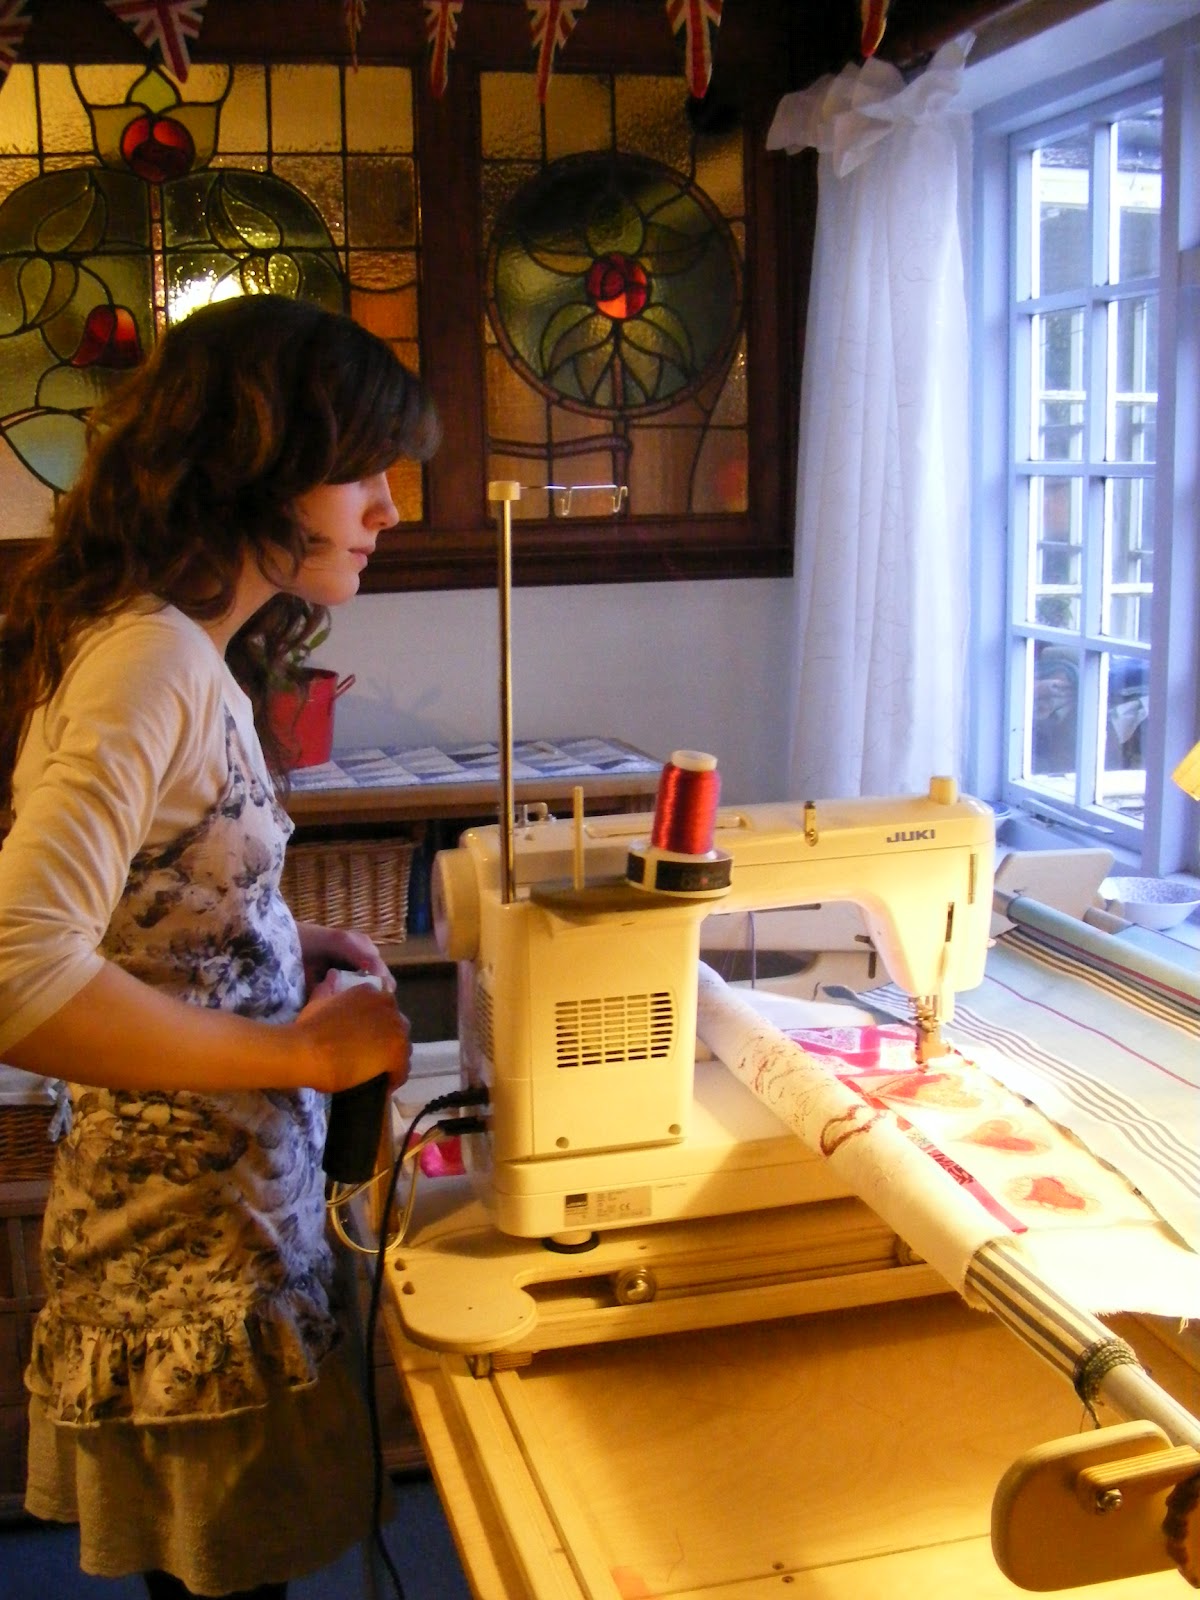
Finally the layers were quilted using the JUKI TL98P. Notice how, even here at the end of the project, I still have plenty of room for the roll of fabric under the arm of the machine! Emily and I took turns quilting. We wanted to mix up our personal styles. We loaded the quilt on the Friday before Christmas. We took turns quilting on Saturday and finished up on the Sunday. Emily and I were really pleased. This was a project that took us way outside our comfort zones. Now Emily is keen to do it again using a more traditional pattern. Kate was very happy too! She's promised to send pictures of her White Christmas quilt in her Paris flat.


Thursday, 5 April 2012

Peacock Feathers


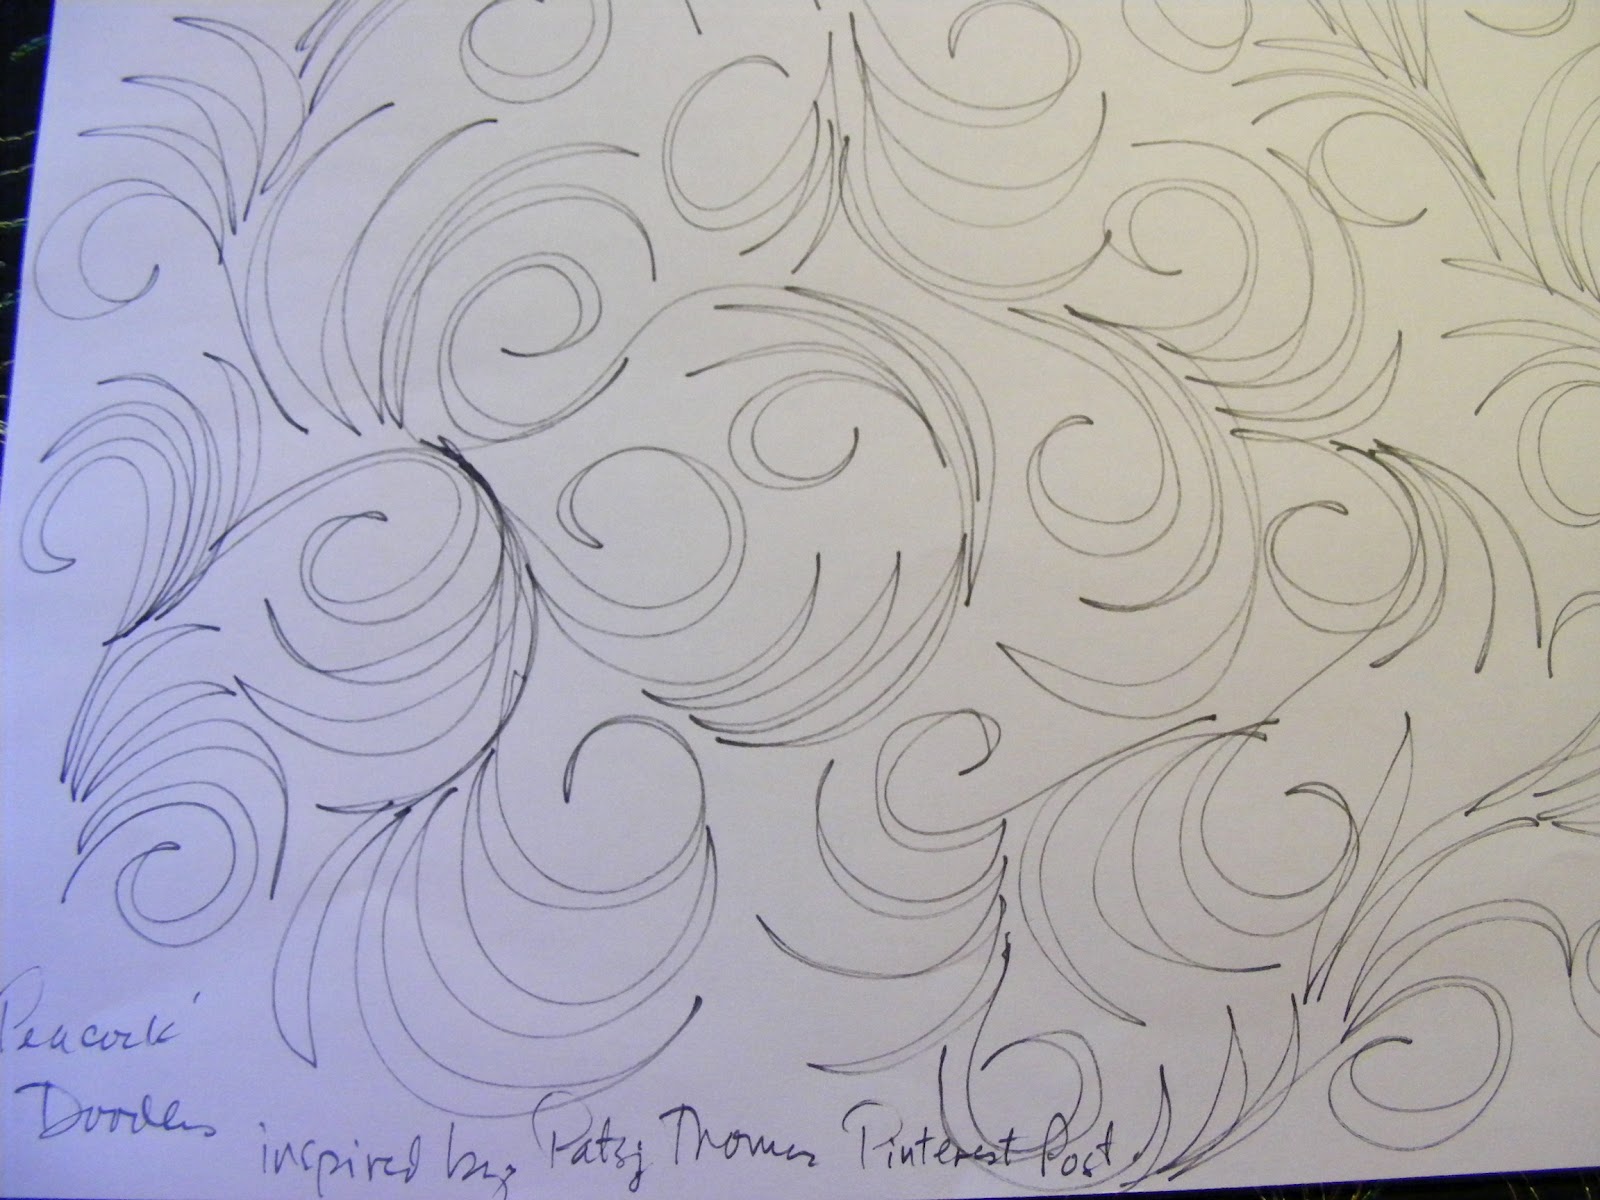
I love how machine quilting designs morph between one person and the next.           I found this fab line design from Patsy Thompson on pinterest the other day. I just had to doodle it,  and when I did, the design turned out like this.


The kids decided that my version looked like
peacock feathers.


And it did!   The JUKI TL98-P sewing machine needle is the perfect 'pen' to draw the feathers. The 6 foot Art Quilter frame holds the 'paper' (black fabric quilt sandwich) steady and perfectly tensioned. This leaves me free to concentrate on drawing with gorgeous variegated thread....it's so fun drawing a line that changes colour!


#836 from Superior Threads.


 I'm not sure how I'm going to use this new line design. But I'm looking for the opportunity and pinterest is certainly giving me lots of inspiration.

Wednesday, 28 March 2012

Kathy's Patch

Look what opened this month in Folkstone, Kent ... a  new Patchwork and Quilting shop called Kathy's Patch. I met Kathy when she was heading home after the Harrogate show last autumn. Kathy was looking for a machine quilting frame to use in her new shop. She stopped by to try our New English Quilter frame. She loved it! She loved the JUKI TL98-P too. They were just what she was looking for. Kathy and her friend Jo wanted to be able to offer customers the chance to machine quilt their own projects right in the shop. Kathy's Patch is so spacious there's plenty of room for the 6 foot Art Quilter frame.


Kathy came back in January to catch our Machine Quilting Retreat at the Petwood Hotel. She wanted some help to get up and running with her new Art Quilter frame and JUKI TL-98 P sewing machine.  Here's a photo of Kathy and Trudi. I think that they dressed to match Trudi's beautiful quilt. 


After months of preparation, Kathy's Patch opened it doors at the beginning of March. I think that having the shop in an industrial unit was a stroke of genius. There is plenty of parking. There is also plenty of room to browse and put various fabrics together as you plan your projects. I just love the quilts hanging from the rafters! Definitely inspiring.


Kathy's Patch has a great selection of Superior Threads. They provide the opportunity to audition the threads while you choose the fabrics.  Visit Kathy's Patch and find a warm welcome because the owners arejust as passionate about patchwork and quilting as you are. And please tell Kathy and Jo that Martha says "Hi!". You can click on the links in the post to find out more about Kathy's Patch. 

Tuesday, 20 March 2012

Harmony

March is always a bit of a mad month for us. For starters, 4 of our 6 children have birthdays between the last days of February and the first two weeks of March. My husband Stephen and I celebrate our 23rd Wedding Anniversary on March 17th followed by English Mother's Day. This year we managed to fit a trip to Russia and a Machine Quilting Retreat weekend.  What a month!

Birthday and Anniversary cards on our dresser
This post is about a gift from Marina Mamonova, who we met in Moscow for the Handicraft Show. Marina and I were working together on a Seminar sponsored by the JUKI sewing machine company. I gave a lecture/demonstration of how we use the JUKI TL98-P and Exceed 600 sewing machines for free-motion machine-quilting on our 4 and 6 foot Art Quilter frames.  Marina gave a free-motion machine quilting workshop using the JUKI Exceed 600 sewing machines. It was such a pleasure to meet and work together. I was especially thrilled to get a close up view of a couple of Marina's quilts. When we said our goodbyes at the end of the Show, Marina gave me this amazing present.

 These Russian fabric dolls symbolize harmony in the home. Marina explained that they are made from antique Russian fabric that is no longer manufactured. So these fabrics are now very rare, much sought after and treasured. Such a precious gift! Marina said not to tuck it away safely in a drawer because it was customary for the dolls to be kept out in the open as a celebration of the harmony between husband and wife.


I love this present! The faceless dolls remind me of their Amish counterparts. I love it that the fabric is priceless vintage. And how the dolls seem to almost lean toward each other - it is amazing that dolls without faces can communicate so much expression. This is a gift that I will cherish!

 Besides being our Anniversary and St. Patrick's Day, the 17th of March is International Quilt Day. This gift  fits perfectly with 2 of the three. I reminds me how happy I am to be married to my husband.  And it reminds me of the ties we have with other quilters all over the world. Now it stands on my dresser, and whenever I see it will evoke a special love for Russian and her quilters! 

Tuesday, 28 February 2012

Appliqué on the frame


Here's a tutorial for a fun technique we used on our Valentine Postcards project. My daughter Rosie will be showing you a way to raw edge appliqué directly on the quilt while it's loaded on the frame.

First, find a space.


Next, cut out a heart from some fabric and just lay it in position. We're going to use a fine sparkly netting to hold the heart in place.


Here you can see Rosie cutting out the netting. We found that the sewing machine foot would sometimes get caught up in pointy bits of the netting, so Rosie is cutting the netting in a rounded circular shape. We found that this worked best. We could go back later and trim the netting if we wanted to.


Then Rosie stitched around the heart shape. The first outline was the trickiest. Rosie is using a red Metallic thread from Superior Threads. It added an extra sparkle to the project.


But once the netting was stitched in place, it was easy to continue stitching round the heart and adding scallops or whatever.


This was Rosie's very first effort at raw edge appliqué. Doing the appliqué directly on the frame made it fast and easy. We think that the end result looked really pretty! We can't wait to try it again with perhaps leaves and flowers for Spring or eggs for Easter.

Thursday, 15 September 2011

Emily's Quilt

Hi, I'm Emily. I'm just about to go off to University on Saturday. I haven’t quilted a quilt in about 6 years – I did a table runner a few months ago, but I hardly think that counts! Even so, I have been practising quilting for a good couple of years – since I started going to shows with my mom. At the shows, you’re demoing all day, three or four days in a row, so by the end you get to be pretty good. I've also been doodling for ages! In the last year, whenever we’ve had a meeting, we’ll always have about 10 minutes where we’re just doodling on the backs of our notes, comparing styles and thinking of different ways to use a design. So although I have never considered myself a quilter, I have done enough practise to make myself good at quilting certain designs.

In April, we had a machine quilter’s retreat, and there’s always a lot of doodling time. I got Trudi Woods to show me how she did a certain design, and when I tried to copy her, I made a mistake, which both of us thought actually looked quite nice, so it became a new quilting doodle! Trudi has gone on to use the design in lots of her quilts, but the fascinating thing is how different her version of the same design is to mine!

So I’ve been practising this design on paper, at shows, everywhere, for months. So it was really about time that I got it down onto a quilt! Mom and I decided to make a quilt as an ‘Emily-Goes-to-Uni’ kind of present, which gave us a deadline (this Saturday!) to work toward.

We decided to sew this extra black strip on one side of the top of the quilt as a place to practice my design and work out my tension before moving on to the quilt top. It was really useful to have the ‘side stage’ strip – so I could get my jerky beginning out of the way. Once I’d started quilting, it flowed very easily. The repetitive motion was, well, repetitive, but it required a certain amount of concentration - look out for that line, which way am I turning next? Right, that’s as far up as I can go, moving on, pause and swing, oh and breathe– if you forget to breathe you get to the end of a row and are gasping for air! Luckily, I remembered to breathe, but I still had to catch myself a couple times and take deeper breaths to relax my shoulders.

I also kept my design maximum one hand’s width tall, because I knew that as I got to the end of the quilt, I would only have about that much space to quilt with, so to keep everything looking even, I took care to watch out for the size of the design. Here I am at the very end. Even with the big roll of fabric under the arm of the machine. I still have plenty of room to execute my design. It helps that the JUKI TL98-P arm is two inches wider and taller than most sewing machines.

I cannot even begin to describe the importance of the ‘rise and fall’ method of quilting! This is quilting in a wavy line, rather than straight across. This is so important because it makes your quilt look like you haven’t quilted it in strips on a frame; it makes everything ‘dovetail’ together really rather seamlessly. To make my design merge properly, I did a lot of scalloping and echoing to fill in the spaces that weren't quite big enough for the whole, um, design. Some of my designs were bigger than others, they went in different directions, some had scalloping, some didn’t, but they all fit together and it looks lovely and complete.

In my breaks yesterday, I would stop once I’d finished two lines of quilting, three if I was on a roll ;) and go and practise the piano. I’m trying to learn a new piece by George Winston, and as you can imagine, there’s a lot of repetition involved in learning the piano too! It was nice actually, to go from one repetitive motion to another, because they were both very different; the quilting is a whole body kind of motion, but my hands are always kept still holding the sewing machine/Nifty Grips, whereas the piano requires me to sit very straight (good for my back!) and to move my fingers very fast, a lot. So it was good to switch between the two.

I had perfect tension all of yesterday, which was awesome. Then today, when I neared the finish line, something happened. I don’t know what, because I didn’t change anything about the sewing machine or the frame, but something changed. Suddenly, my tension underneath was pulling the top thread through and it looked nasty. The stitches weren't looking nice and weren’t held down properly, so they’d have come out if I washed the quilt. We used a mirror to see underneath. All was not well - we needed to do some unpicking!

We adjusted the tension on the sewing machine, so it was tighter on the top, and it helped a bit, but not enough. So we took the sewing machine off the frame, cleaned it out (there was quite a lot of fluff from the fleece in there!), put a new bobbin in, and oiled it. Then did some free-motion quilting on a practice piece off-the-frame to get any surplus oil out of the machine so it didn’t stain the quilt and to check that the problem had been solved. Luckily it had. I really hate quilting this way! It reminds me why we have a frame! Unluckily, I still had all these stiches that looked bad, so I had to sit there and unpick! It probably took three quarters of an hour to unpick a quarter of a line of stitching, which took me maybe 10 minutes to quilt. About halfway through my mom comments: So, whose idea was it to quilt such a complicated pattern? Thanks mom : )

After sorting the unpicking, I put the poles back into the frame, rolled them up, and started as if I’d never stopped. I had 'dancey' tunes playing, and everything was great. Finished in no time – and even signed my name!

Now I’m exhausted, yet ridiculously pleased with myself for actually quilting a quilt!!

Thursday, 26 May 2011

Child's Play

Today we set up our 6 foot Art Quilter frame with the JUKI sewing machine at my son's primary school. Peter is in year 6 and his teacher wanted some help with a textile project. She'd asked me to quilt some 'sari' fabric that the class had picked up on a school trip to Leicester.

I suggested that we get the kids to do it. Peter's teacher liked the idea. Kids love machine quilting. They're not afraid to try new things. They thought the JUKI sewing machine was brilliant. The Nifty Grip speed control handles were easy to use. They quickly realized that the needle was like a pen. They loved making the sewing machine go wherever they wanted and really liked the trail the thread left to show where they'd been.

They doodle all the time - so warming up was easy.

We decided to only use one layer of fabric and give everyone a chance to machine embroider their name and any other designs they wanted. Everybody had a couple turns. Then we took the fabric off the frame, sliced it into triangular flag shapes with the rotary cutter, hot glued it to some dowels and made flags.

Start to finish it was just over two hours. The kids really enjoyed the afternoon. The flags were a hit! Everybody liked taking home their very own hand guided textile project. Quilting is cool!!

Wednesday, 25 May 2011

A Piece of the Action


One of my favourite things about shows is watching people's expressions as they try a machine quilting frame for the first time. There is a moment of stunned disbelief as the carriage holding the sewing machine starts to glide effortlessly over the top of the quilt at the touch of a finger. The eyes widen and focus, considering the new potential that this sort of tool opens up.

No more pinning or basting or gluing or tacking! No more frustrating pain in the neck as you try to hold the layers of the quilt together AND move them smoothly round the bed of the sewing machine. Within seconds of guiding the sewing machine over the top of the quilt you are creating a bold and flowing line, the stitch length is already pretty good and you begin to imagine what you could do with a bit of practice. Exciting stuff!

People start with circles and loops. The needle has become a pen and the thread is transformed into gloriously coloured ink. The perfectly tensioned quilt top becomes the paper. As this realization dawns people go on to writing their names and begin drawing flowers and stars, houses and at this show... cats! I'll end with one of my favourite drawing from the Italian show; this lovely woman, trying out our frame for the first time began drawing people holding hands. Just wonderful!

After the show closes for the evening, Emily and I cut out the designs from the show demo quilt sandwich and keep them to hand out as machine quilting samples. Quilters are so tactile! Having watched a demonstration or had a go yourself, it's good to walk away with a sample of what can happen when you put a JUKI TL98-P on an Art Quilter frame. If you would like a 'piece of the action' give us an email and we'll send you a machine quilting sample:

martha@machinequilter.co.uk