 |
| a three layer quilt sandwich on the New English Quilter frame |
This post features a new pinning method not yet in our New English Quilter Handbook. I've been demonstrating this pinning method to our customers coming to collect their New English Quilter frames. So I thought it would be good to have a pinning tutorial to refer back to.
 |
| The ratchet ends of the fabric poles are labelled 1, 2 and 3 |
Notice that the ratchet ends of the fabric poles are labelled 1, 2 and 3.
 |
| a side view of the numbered fabric poles |
Intro: The first fabric pole is closest to you as you stand by the sewing machine. The second is in the middle. And the third is farthest away from you. Each layer of your quilt sandwich will be pinned to the first leader on fabric pole #1. The other end of the backing fabric will be pinned to the third leader on fabric pole #3. The other end of the quilt top will be pinned to the second leader on fabric pole #2. The wadding will only be pinned to the first leader, then it will go over the backing fabric and under the quilt top and hang down the back of the frame. Before you start, for ease of pinning, I suggest taking off the sewing machine and the carriages and putting them to one side out of the way.
 |
| Bring fabric pole #3 to the front of the table. |
1.With this new pinning method, the last shall be first! We begin with the 3rd fabric pole. Leaning over the frame to pin onto this 3rd leader makes my back sore!! This new method is much easier to do and kinder to my back. Take the 3rd fabric pole off the frame and bring it forward to the front of the table. Keep the ratchet end to the right of you and notice that the leader fabric is coming OVER the TOP of the fabric pole.
 |
| Butting the two ends together, pin to the back side of the 3rd leader |
Loading a quilt sandwich on the frame is a centring process. Hold your backing fabric so that the right side is facing downward. Now find the centre of your backing fabric and match it to the centre mark on the BACK of the third leader. You're going to butt the two ends together and pin from the centre outwards.Carry on pinning all the way to the end. I usually use a safety pin at the end.
 |
| I use a safety pin for the last pin here |
The frame tension can sometimes bend the straight pins but the safety pin is strong enough to cope without getting bent out of shape.
 |
| pinning the backing fabric while sitting down at the table |
If it's more comfortable, another option is to do the pinning sitting down at a table. Just remember to keep the ratchet end of the fabric pole to your right and make sure that you've got the leader fabric coming over the top of the pole. Now drop your 3rd fabric pole back on the frame, in the slot furthest away from you. It will look like this. You have finished step one!
 |
| the backing fabric is pinned to the 3rd leader |
2. Now for step two. First take the 2nd fabric pole off the frame and put it to one side out of the way. We'll come back to that pole later. Now pull the backing fabric from the 3rd pole forward to the first fabric pole. Find the centre and pin it to the centre mark stitched on the leader fabric, This time you pin to the TOP of the leader, aligning the backing fabric to the stitched line on your leader, just like in the photo below.
 |
| find the centre and pin along the stitched line |
Pin from the centre all the way to both ends.
 |
| pin to the end and finish with a safety pin |
Now tighten your frame tension and you will have made a platform with your backing fabric, like this...
 |
| pull the backing fabric forward and pin it to the first leader to make a platform |
Now take your wadding and throw it over the back of your frame.
 |
| throw your wadding over your frame so it falls down the back |
 |
| centre it , smooth it out and pin it |
 |
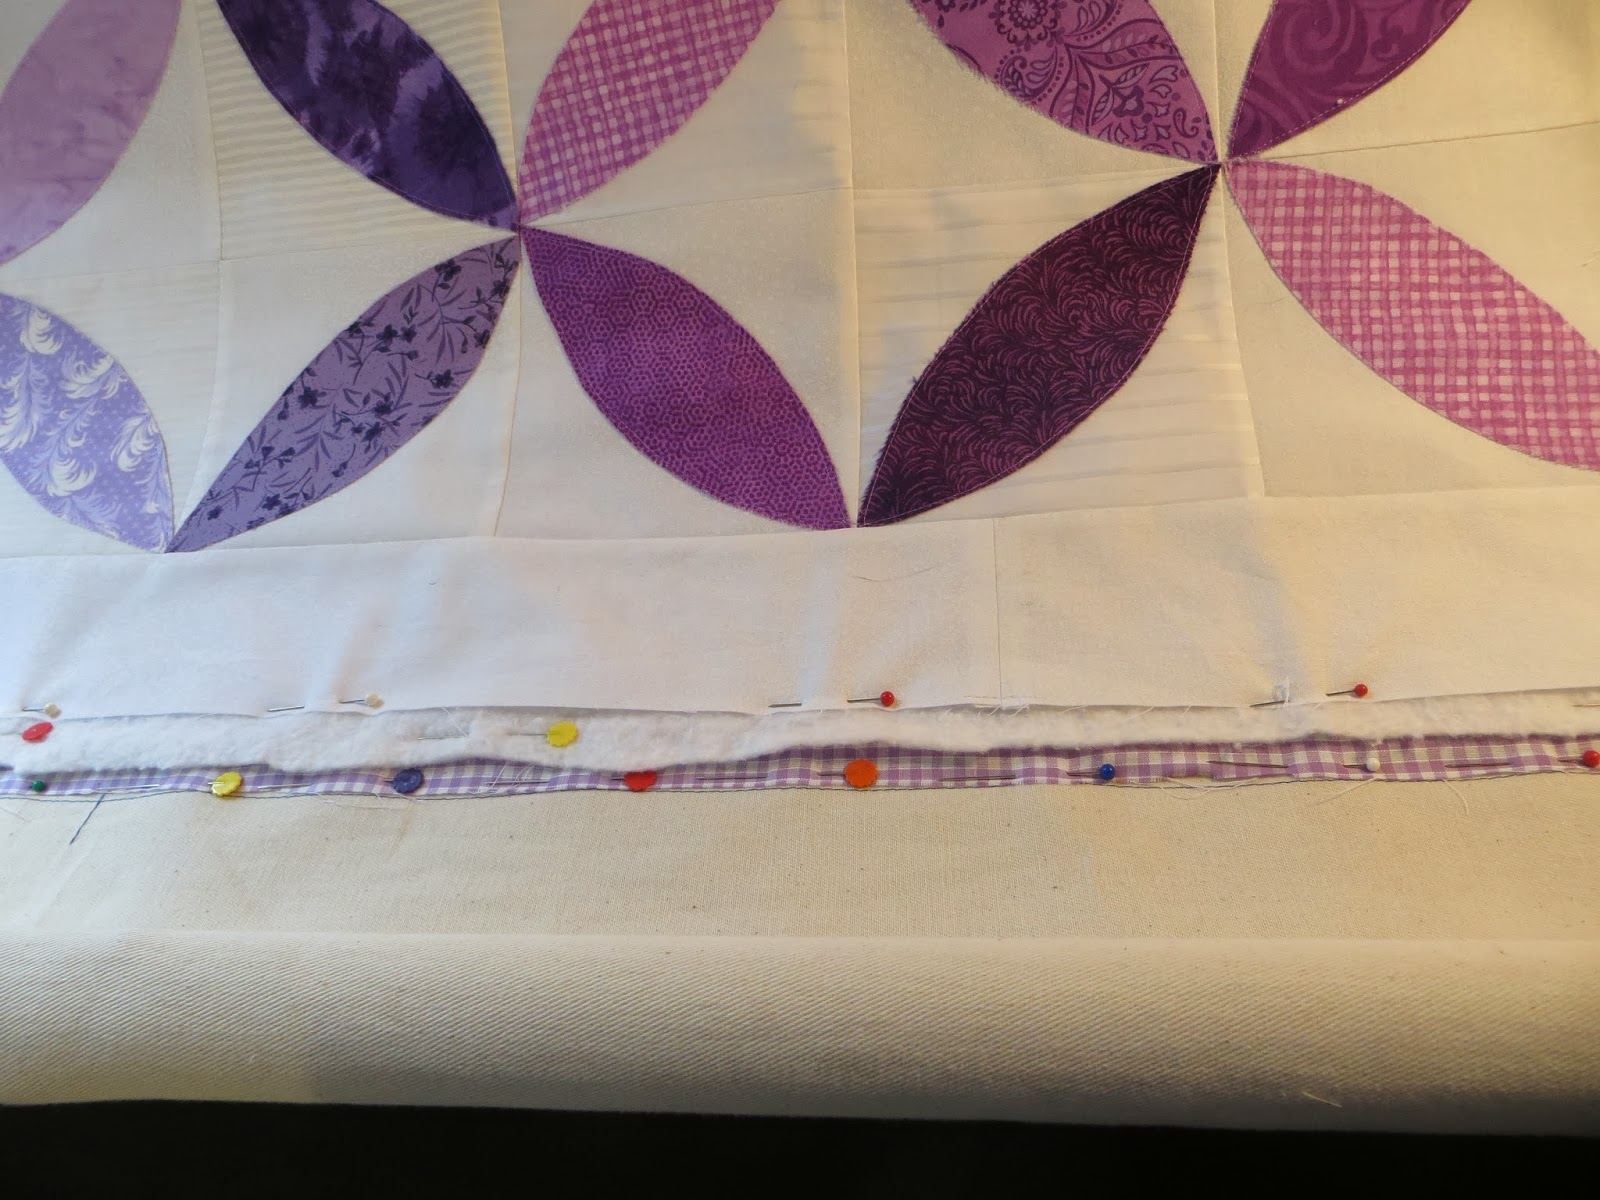
| stagger the layers about a finger's width |
Notice how the layers are staggered just a bit so you can still see the pins from the first backing layer. Good, now you have finished the 2nd step.
3. Now you will pin the top. Go find the 2nd fabric pole, You are going to pin the back of the quilt top to this 2nd fabric pole. Treat this the same way as the 3rd pole. You can pull this pole forward or sit down at the table, remember to keep the ratchet end on your right but this time the fabric goes under the pole. Find the centre, butt the ends together and pin to the back of the leader, starting in the centre and pinning toward both ends. When you're finished, drop the pole back in the frame. Now pull the quilt top toward the first leader, over the platform made by the first two layers. Once again leave a finger's width of space and then pin in place finishing with a safety pin at both ends.
 |
| All the layers of the quilt sandwich pinned to the first leader |
 |
| the centre marking helps to centre your fabric layers |
Once all the layers are loaded on the frame put the carriages back on the tracks and
take the first fabric pole off the frame and slip it through the arm of the sewing machine and through the slots on the side arms.
 |
| Slip the first fabric pole back under the arm of the sewing machine |
Now you are
ready to roll!
|
| The fully loaded frame. |


3 comments:
Excellent tutorial Martha, thanks for that. Love the Purple Pumpkin quilt.
Thanks Stephanie : )Did you know that my post about your Festival of Quilts exhibition is one of my most popular posts, with 266 visits so far. You certainly generate a lot of interest!!! : )
Wish I'd seen this previously! I omitted to make the platform with the backing fabric - I tightened everything up later once everything was pinned. This was the first time I had done a quilt - only practise bits previously.
Now that I look at the back of my quilt, it is not as flat and smooth as I would have liked. Also I sewed my pattern lines sometimes from the left and sometimes from the right. I wondered it this would drag the fabric either way, but of course if it was really tight it shouldn't matter - should it?
Thanks for this tutorial!
Perhaps I ought to come down to Lincoln some time - I am not that far away actually.
Post a Comment