Showing posts with label Juki HZL Exceed 600. Show all posts

Saturday, 14 February 2015

Little Quilts on the Go

stitching pretty fabrics together on the JUKI HZL Exceed 600
I love to make Valentine postcard quilts. Most postcard tutorials show how to make the postcards one-by-one, but this post will show how to use a machine quilting frame to create lots of postcards at the same time. First, I go through my stash and pick out reds, pinks and heart fabrics and stitch them together.

Machine quilting hearts and loops on the 6 foot New English Quilter with the JUKI TL98P
Then I load the pieced top on my New English Quilter frame with some fleece underneath to serve as backing and wadding.

scalloped machine quilting detail stitched with the JUKI TL98P on the New English Quilter frame
Then I choose pretty pink and red threads from the Superior Threads range and 'draw' scallops around the hearts or doodle loops and hearts over the pieced top to create texture.

Notice the gorgeous machine quilting threads, from Superior Threads in the background.  I'm using Fantastico.
Creating the line designs with thread on the fabric 'canvas' is the fun part!

machine quilting hearts and loops detail with Fantastico #5031
This is a fun way to try out lots of different designs and play with lots of different threads.

hearts and loops machine quilting detail with variegated Rainbows thread from Superior Threads
Next, make the postcard backing. There are postcard templates that can be downloaded, scaled to various sizes and then printed on your home printer. Use an old dull blade and your ruler and mat to rotary cut the postcards for a professional look.

cutting out the postcard backings with the rotary cutter, ruler and mat
  • Now take your postcard backings and find some nice parts of your quilted top. 
  • Use them as templates and cut up your quilted top to fit lots of little postcards. 
  • I use scissors to snip round the first time. 
  • Then I straight stitch round the postcard, 
  • Then use the sharp rotary cutter blade to tidy the edges. 
  • Then finally go back to the machine and zig-zag around the edges.
Zig-zaging round the edges with the JUKI Exceed 600 using variegated Fantastico thread
the fabric front and the postcard backing are all stitched together
Now they're all ready to write your notes and pop in the post. My postmistress was so impressed. Posting costs just the same as an ordinary postcard or letter and they travel all over the world!

machine quilted postcards all stitched and ready to go
If you want to hand-deliver the postcards you can find and print your own stamps.

Fabric postcards with a heart stamp for hand delivery
I probably spent more time writing this blog post than making the postcards! The NEQ quilting frame makes it possible to make lots of cards quickly and beautifully. What fun to make little quilts that get to travel all over the world! Once you've made some you'll think of all sort of other themes and occasions to make and send machine quilted postcards. For other postcard ideas visit my 'Going Places' pinterest board.

Thursday, 2 October 2014

Piecing Fleece

piecing fleece using the zig zag stitch on my JUKI Exceed 600

I'm going to do a few posts on fleece. I sometimes use fleece as an alternative to backing and wadding.

Fleece can do the job of both backing and wadding at the same time for a fraction of the cost.

Fleece is easy and fun to machine quilt and gives a soft and cuddly finish. What's not to like?

One of the great features of fleece is that fleece doesn't fray!

Which makes it great for all sorts of craftsy projects including quilting.


Here I'm piecing fleece by butting the two edges together and using a zig-zag stitch to join them.


 I do this to avoid the extra bulk that a regular straight stitch seam would make.

Here I've pieced together some scraps of fleece to make a bigger backing. 

I used a grey thread because it was in the machine from when I was piecing the top. If I had changed the thread to match the fleece colour, you would not notice it at all.


Grey OMNI thread is ideal for piecing
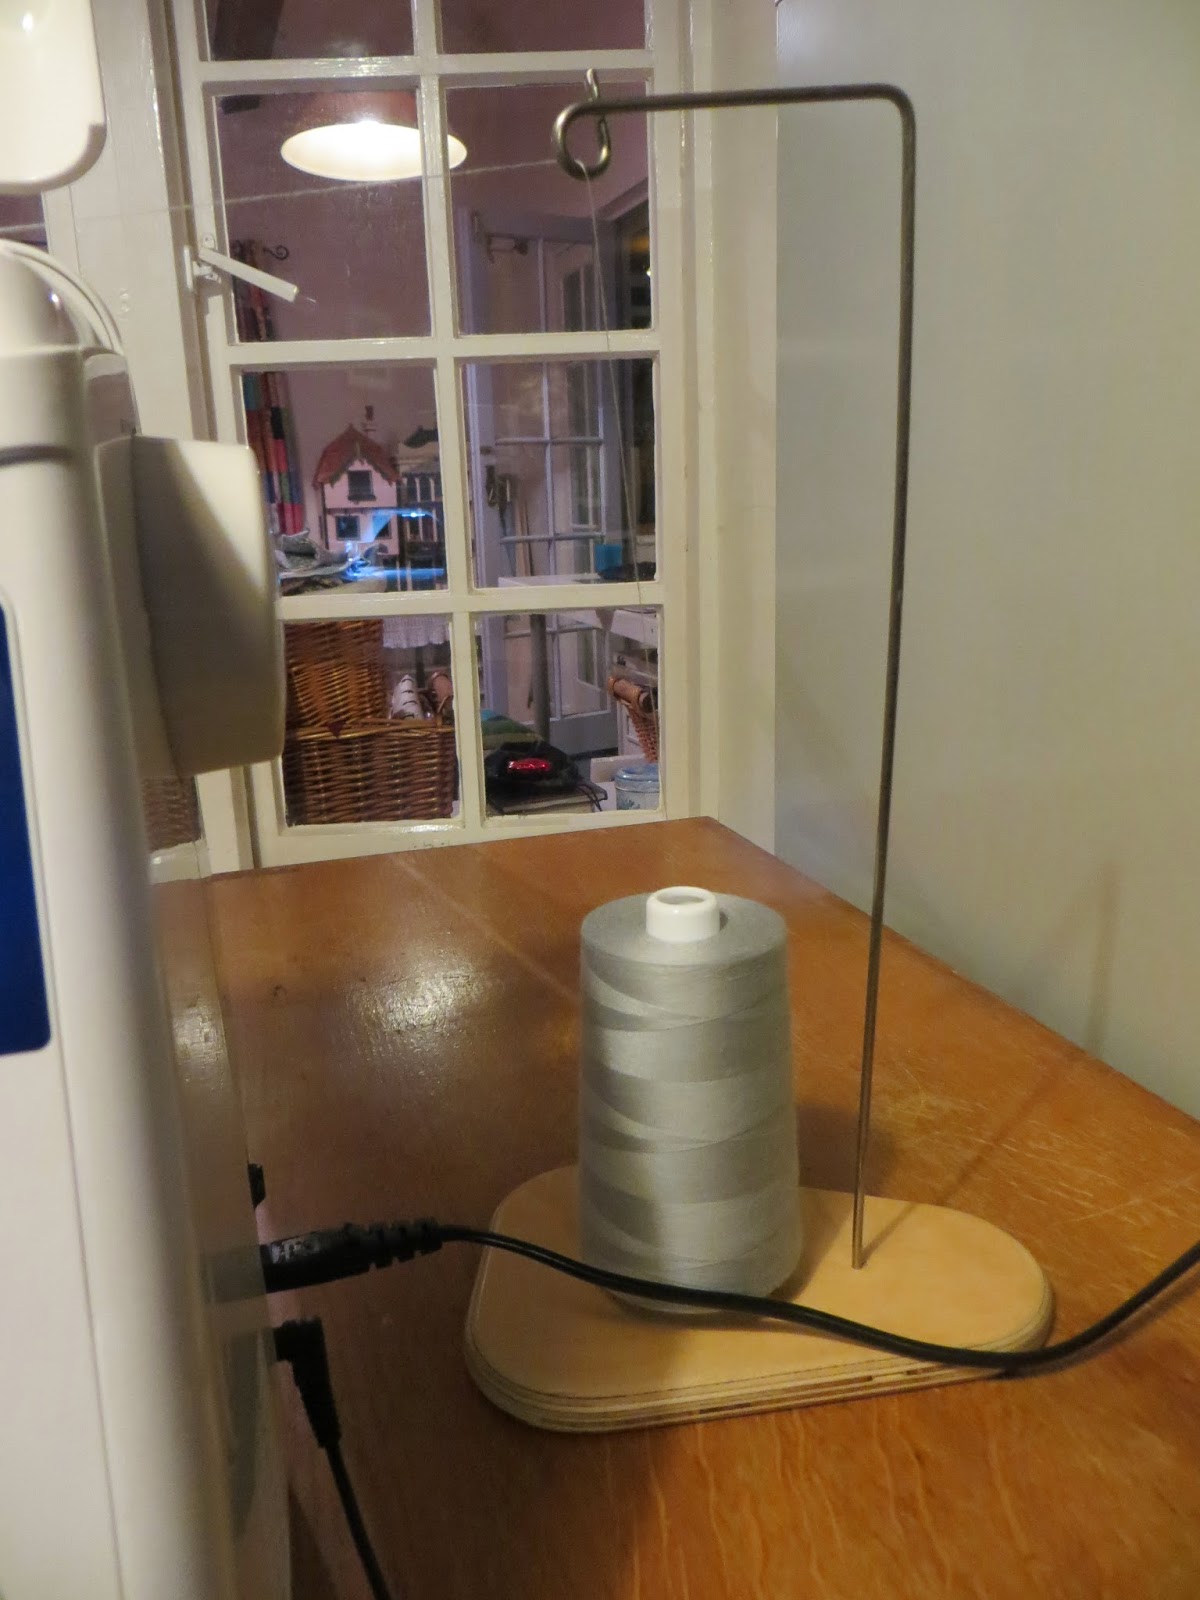
My JUKI HZL 600 sewing machine does not have an extendible thread guide for these larger, more economical cross-wound cones. This thread stand lets me take advantage of the large cones. I put the thread on the stand and run it through the wire loop at the top, then I go ahead and thread my sewing machine as normal.

zig zag stitch for piecing fleece JUKI HZL Exceed 600
I used this pale pink fleece as the backing and wadding for Rosie's university quilt. Notice how nicely the quilting pattern shows up on the fleece backing.

(look at the roll under the arm of the sewing machine) Now that it's getting colder, it makes me happy to think of Rosie all nice and warm, snuggling under her fleecy quilt.

Fabric Online is a great UK source for fleece.

Rosie's university quilt on the 8 foot New English Quilter2 frame

Saturday, 11 May 2013

Raw Edge Applique

Raw edge appliqué on the Juki HZL Exceed 600 
 Here's a quick raw edge appliqué tutorial. I began by preparing the fabric.

Vilene to stabilize the fabric

I ironed a thin fine Vilene to the back of the purple fabrics to give stability and support.

it only needs 8 seconds to stick

trace the template on the vilene - the back of the fabric
 I used a ball point pen to trace the template.

tracing the template
I used the Shelby instant download PDF pattern for the template. I cut it from a plastic folder and traced it will a ball point pen onto the vilene back of the purple fabric.

cutting out the 'petals'

Then I cut out the 'petals' making sure to cut off the ball point ink. Now I was ready for the appliqué.

pinning the purple petals

I pinned the 'petals' in place diagonally across the pieced squares.

I used some fleece to make a design wall and pinned up my practice piece
I chose a light purple thread #607 from the Bottom Line range of Superior Threads. This is a very fine thread designed to go in the bobbin but it's perfect for machine appliqué. This thread is so fine that it will disappear into the fabric.

# 607 Light Purple Bottom Line on top and #624 White in the pre-wound bobbin
These larger cones are cross wound and need to come off from the top of the cone. This thread stand allows me to use the economical larger cones with any sewing machine. I simply place the cone on the thread stand, thread it through the loop and thread the machine as normal.

This simple thread stand lets me take advantage of the larger cones
The amazing box feed on the Juki HZL Exceed 600 makes this machine a dream to machine appliqué with. The seams lie straight and flat with no puckering. Perfect! This raw edge appliqué technique is so much quicker than the hand basted method that I used the first time. I'm thrilled with how quickly the project is coming together.

the industrial box feed on the Juki Exceed 600 makes a lovely line of stitching